The complete guide to creating D365 F&O cloud-hosted build environment
How to deploy a cloud-hosted D365 F&O build environment in an existing LCS project. The connection to Azure DevOps, the agent settings and the first build.

A cloud-hosted build environment is a virtual machine (VM) that compiles the X++ code of a Dynamics 365 Finance and Operations (F&O) project and creates the deployable packages. You deploy it through Lifecycle Services (LCS) with the same wizard as the development environment in part 1 of this series. This guide covers what is different, from the connection to Azure DevOps to the first build.
Check first whether you still need a build VM. In October 2026 there are three cases:
- Existing LCS projects. This guide is for them. They can still be used.
- New customers. This guide is not for them. Microsoft has not allowed new cloud implementation projects in LCS for Finance, Supply Chain Management and Project Operations since 16 February 2026. New customers work in the Power Platform admin center, which has no build environments.
- Teams that only need the deployable package. They do not need a build VM. Use a build pipeline on Microsoft-hosted agents instead. It compiles the code and creates the package, but it cannot run X++ unit tests or synchronize a database.
What a build environment is for
A build environment is a Tier-1 environment like the development environment, but with the topology Build and Test. Its default build definition does four things:
- It gets the code from Azure DevOps and builds all modules in the branch.
- It deploys the reports and synchronizes the database on the build VM.
- It creates a deployable package and publishes it as a build artifact in Azure DevOps.
- It runs the automated tests of the modules with
Testin their names.
Do not develop or debug on the build VM. That keeps every build clean and predictable.
Step 1. Connect the LCS project to Azure DevOps
LCS has to know where the source code is before it deploys a build environment. It looks for a Team Foundation Version Control (TFVC) repository. If your code is in Git, initialize a TFVC repository first and connect LCS to the project that contains it.
- In Azure DevOps open your user settings and select Personal access tokens. Create a token for the organization of your project and set an expiration date. Microsoft lists no scopes for it and its troubleshooting table asks for a token with full permissions. Copy the token, because Azure DevOps does not show it again.
- In LCS open your project and select the Project settings tile.
- Select Azure DevOps and then Setup Azure DevOps. If the project is already connected, select Change and enter a new token, because the stored one may have expired.
- Enter the token and the root URL of the organization. LCS requires the old format
https://yourorganization.visualstudio.com. Then select Continue. - Select your Azure DevOps project, confirm the work item mappings with Continue and select Save.
The LCS user who starts the deployment also has to be a user in Azure DevOps and has to authorize LCS to access it. Until then the action center in LCS shows that the setup is not complete.
The default build definition builds the modules in the folder Metadata under the branch Trunk/Main of that repository. A team with its code in Git has to add its own pipeline for that code.
Check two settings in Azure DevOps before you deploy. Disable creation of TFVC repositories is on by default in new projects and blocks a new TFVC repository. Disable creation of classic build pipelines under Organization settings > Pipelines > Settings is on by default in organizations created since 2023 and blocks new classic pipelines, the only kind that builds a TFVC repository.
Step 2. Open the deployment wizard and select the topology
You need everything that part 1 lists under Before you start.
-
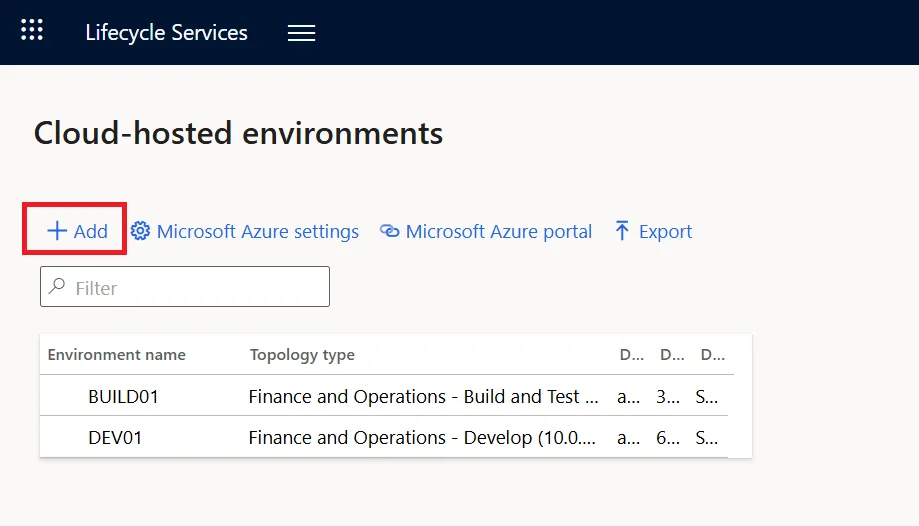
In your LCS project open the menu at the top of the page, select Cloud-hosted environments and then + Add.
-
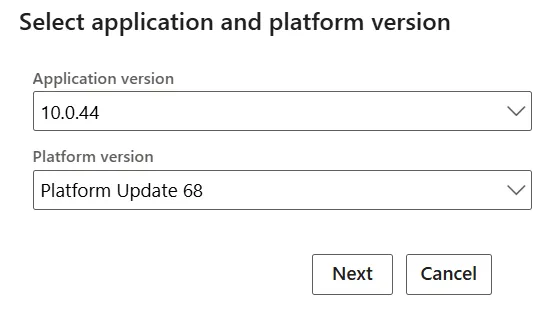
Select the Application version and the Platform version and then Next. Take the version of your sandbox and production environments, so that the packages fit them.
-
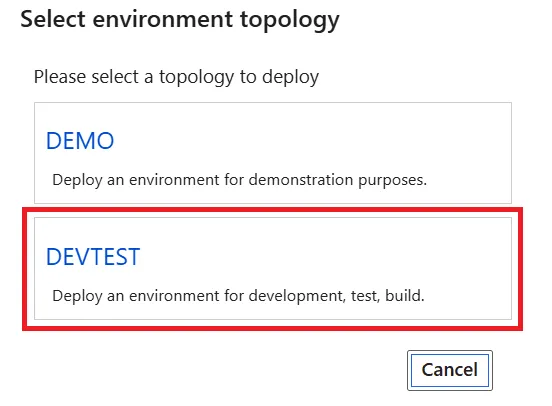
Select DEVTEST as the topology.
-
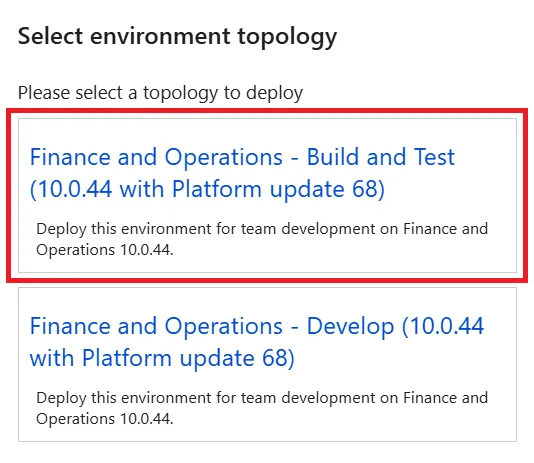
Select the topology with Build and Test in its name.
Step 3. Name the environment and choose the VM size
-
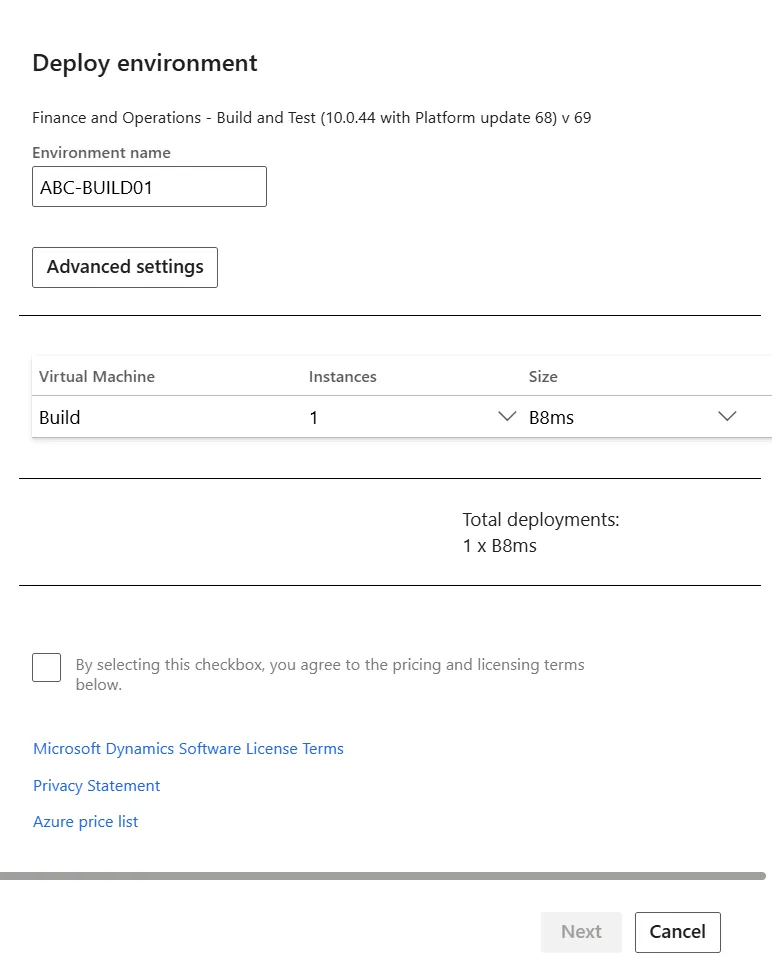
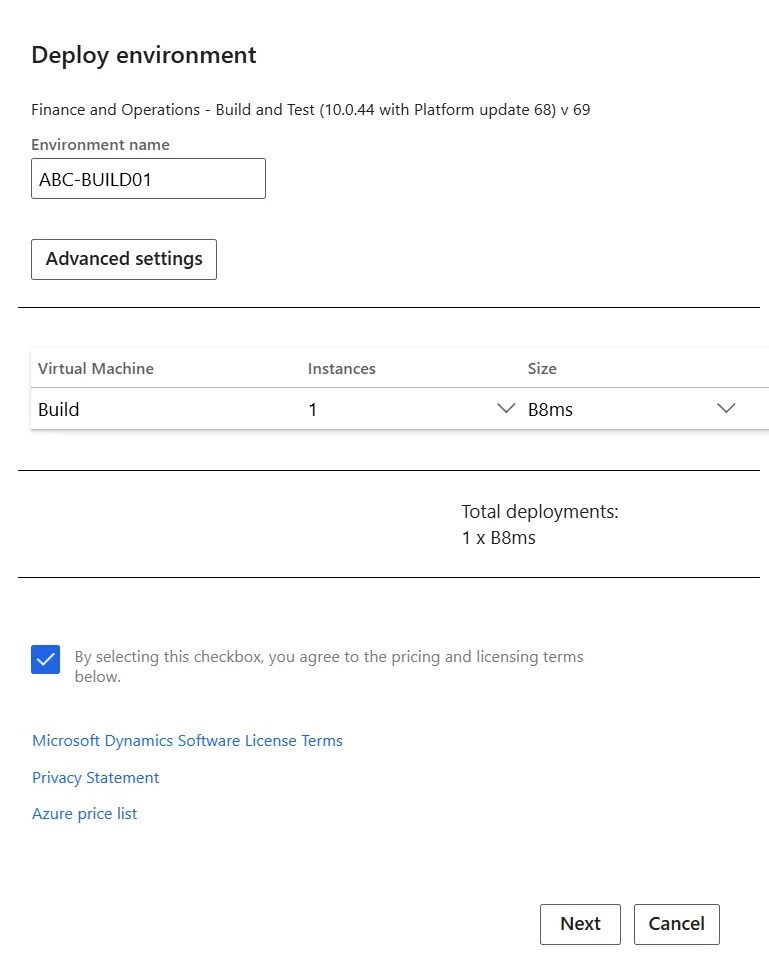
On the Deploy environment page enter an Environment name that follows your naming convention, for example
ABC-BUILD01for the customer ABC. -
Select the VM size in the Size column. The VM has to compile all your models and run your automated tests. The screenshot below shows B8ms, a burstable size. It collects CPU credits only while it runs, which does not fit a VM that you stop between builds. Read what part 1 says about that size before you take it.
Step 4. Fill in the build agent settings
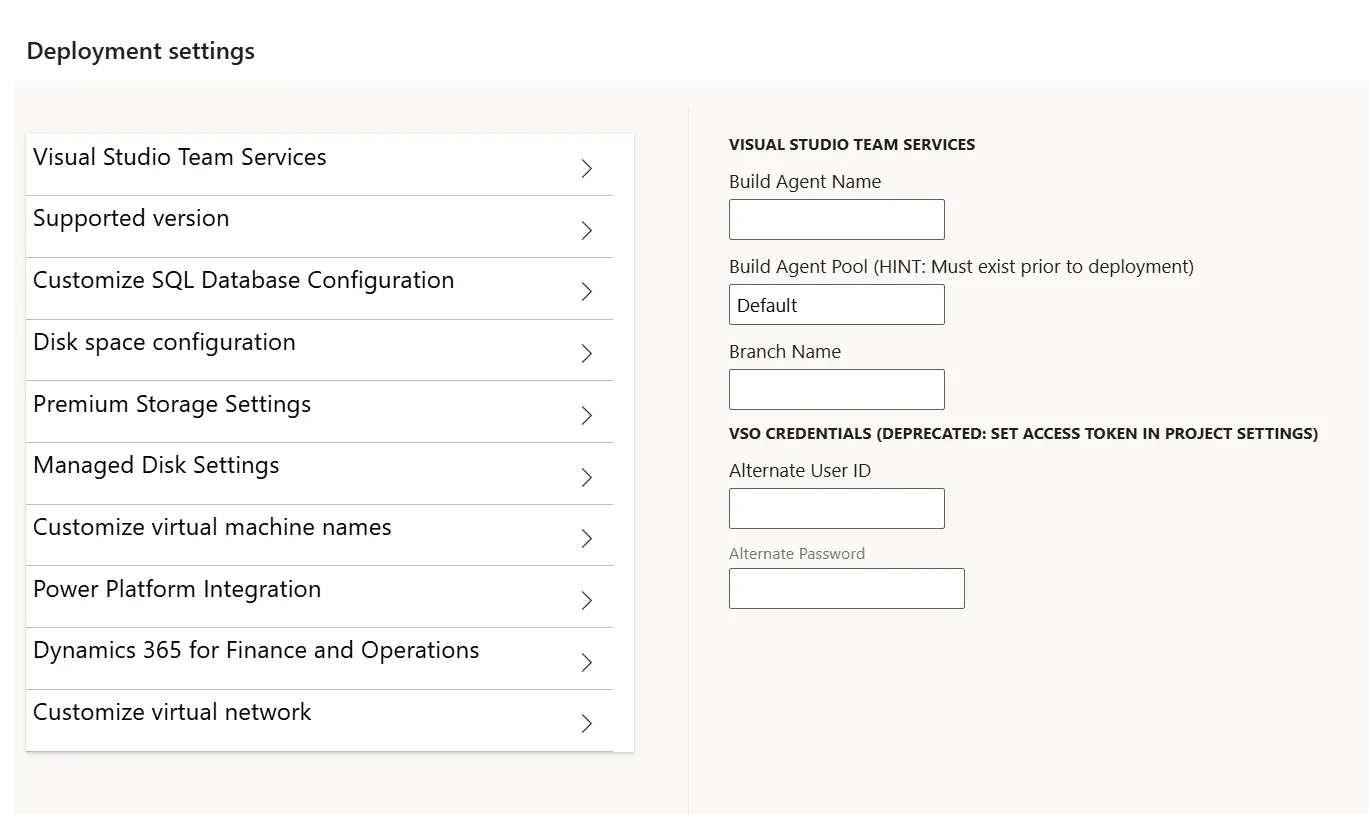
Select Advanced settings. The Deployment settings page opens with ten sections. The first one exists only for a build environment and LCS still labels it Visual Studio Team Services, the old name of Azure DevOps. It has three fields:
- Build Agent Name. The name that the build agent gets in Azure DevOps. Enter a name, for example the environment name. The screenshot below shows the field empty.
- Build Agent Pool. The agent pool in which the deployment registers the agent. It must exist before the deployment. Azure DevOps comes with the pool
Default. - Branch Name. The TFVC branch from which the build VM takes the source code. The default is
Main, which is the branchTrunk/Mainfrom step 1.
Leave the two fields under VSO CREDENTIALS empty. The screen marks them as deprecated and points to the access token from step 1.
Step 5. Go through the other advanced settings
Step 4 of part 1 explains the other nine sections. For a build VM set them like this:
-
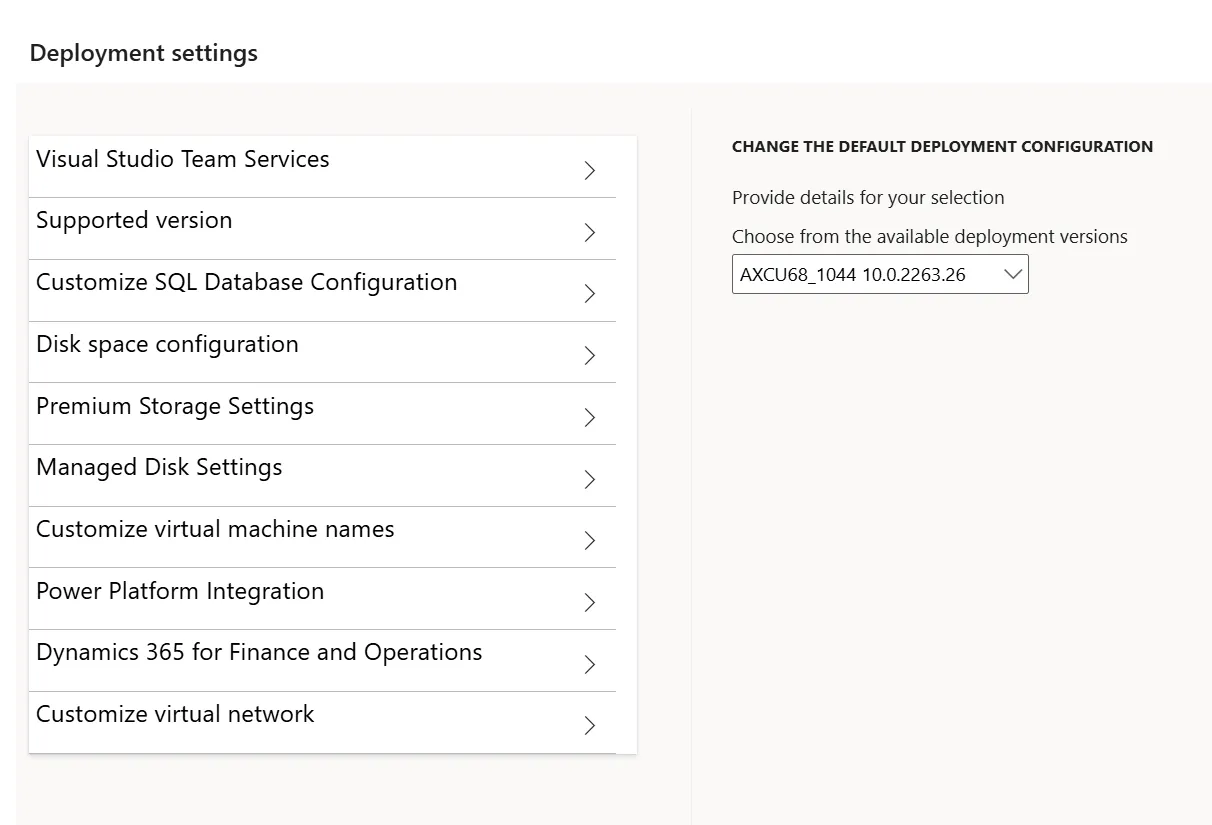
Supported version. Keep what LCS proposes.
-
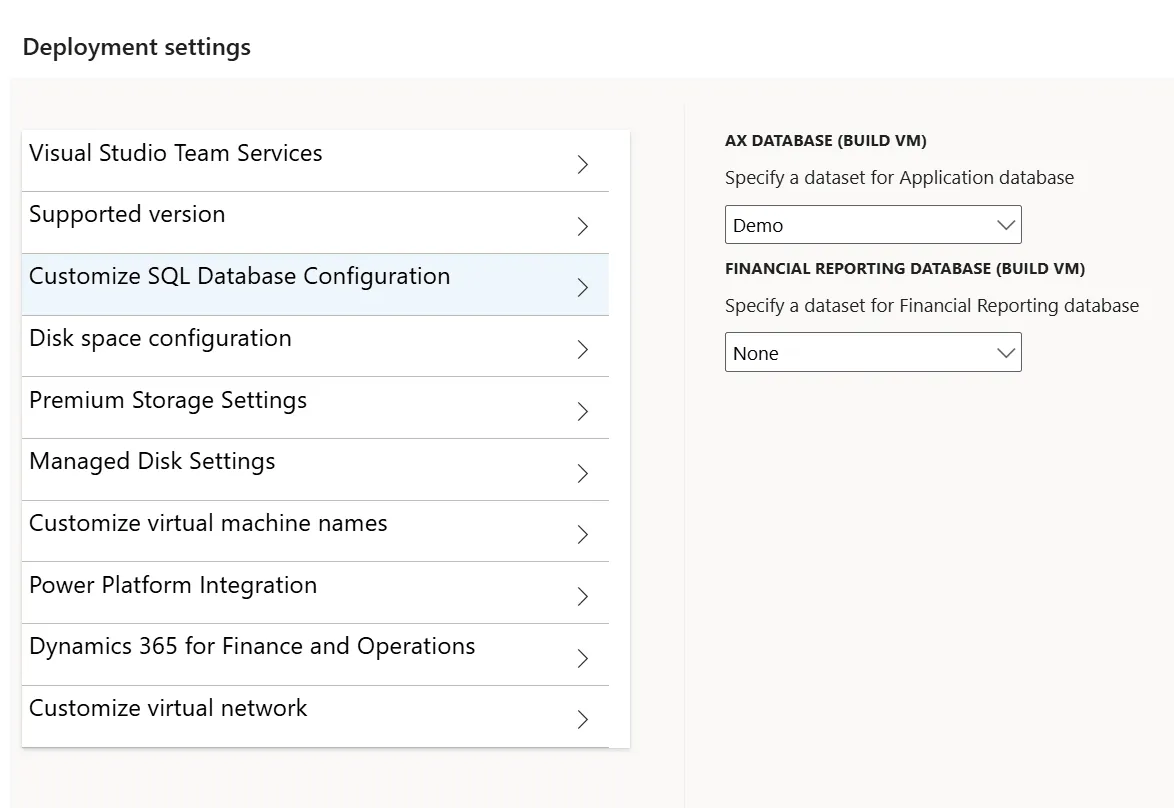
Customize SQL Database Configuration. Select Demo under AX DATABASE if your tests need the Contoso demo data and None if the VM only builds. Leave FINANCIAL REPORTING DATABASE on None.
-
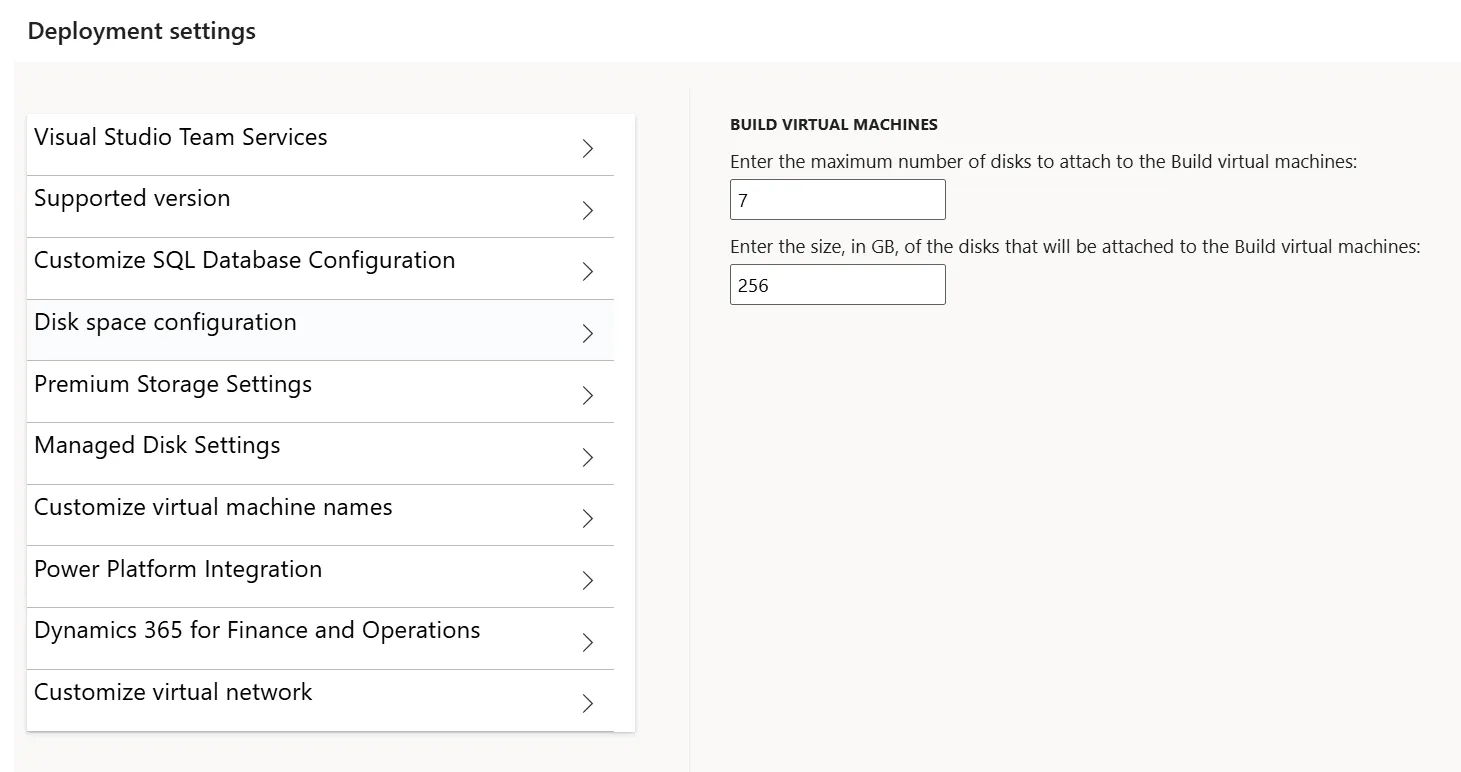
Disk space configuration. Enter no more disks and no more GB than you need. The screenshot below shows 7 disks of 256 GB.
-
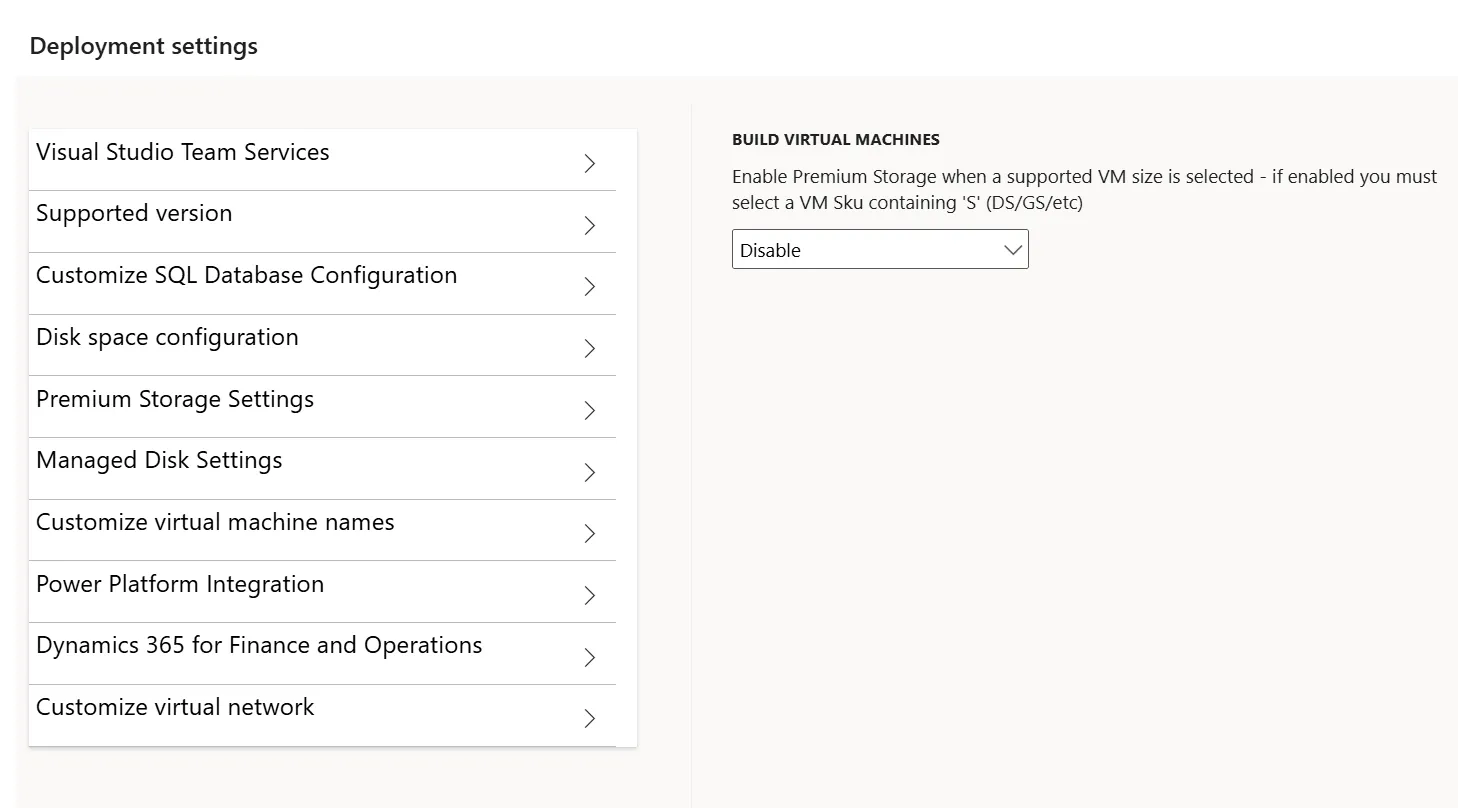
Premium Storage Settings. Select Enable if you build often. It needs a VM size with an S in its name. The screenshot below shows Disable, which costs less and is slower.
-
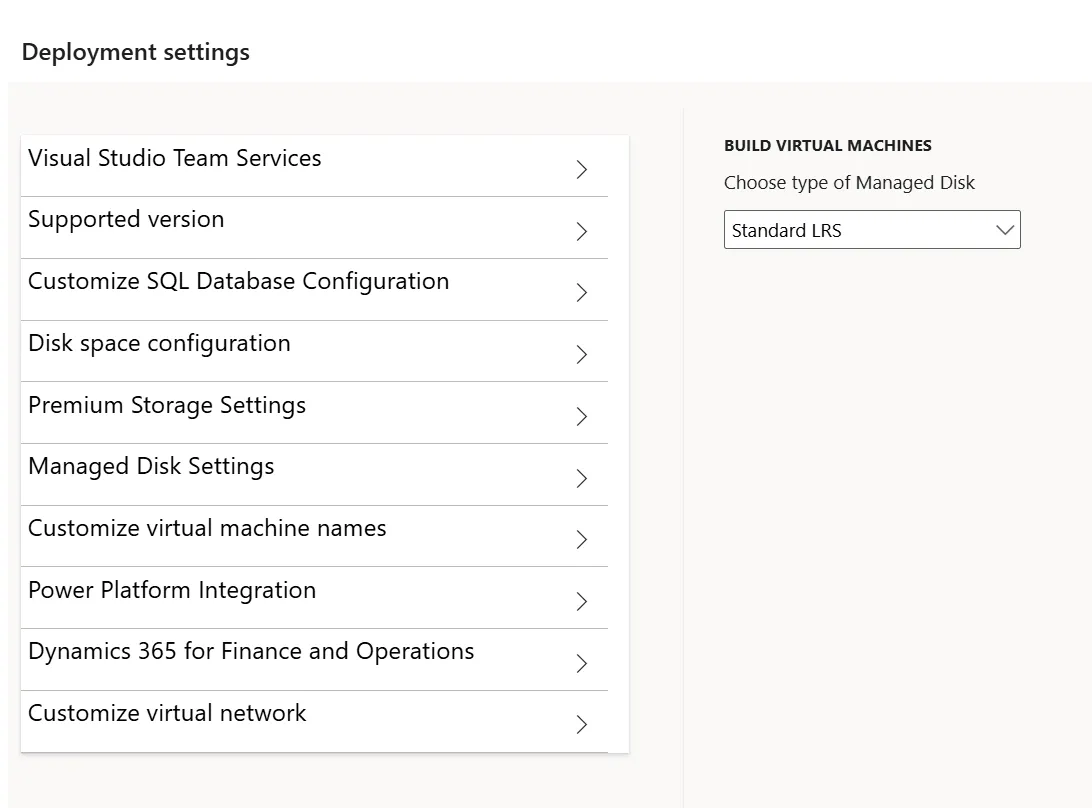
Managed Disk Settings. Select Premium LRS if you want faster builds. The screenshot below shows Standard LRS, the cheaper and slower disk type with the limits that step 4 of part 1 names. Do not select None.
-
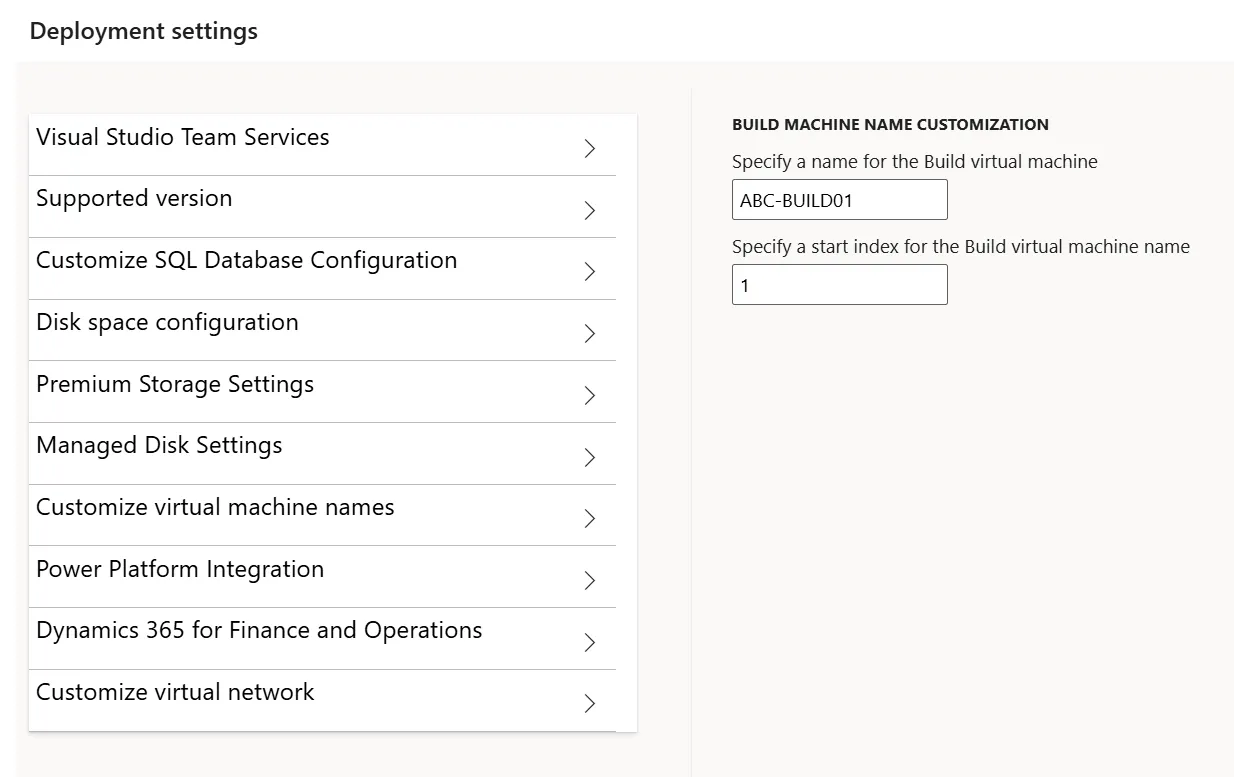
Customize virtual machine names. Enter the environment name from step 3 and keep the name with the number added within 15 characters.
-
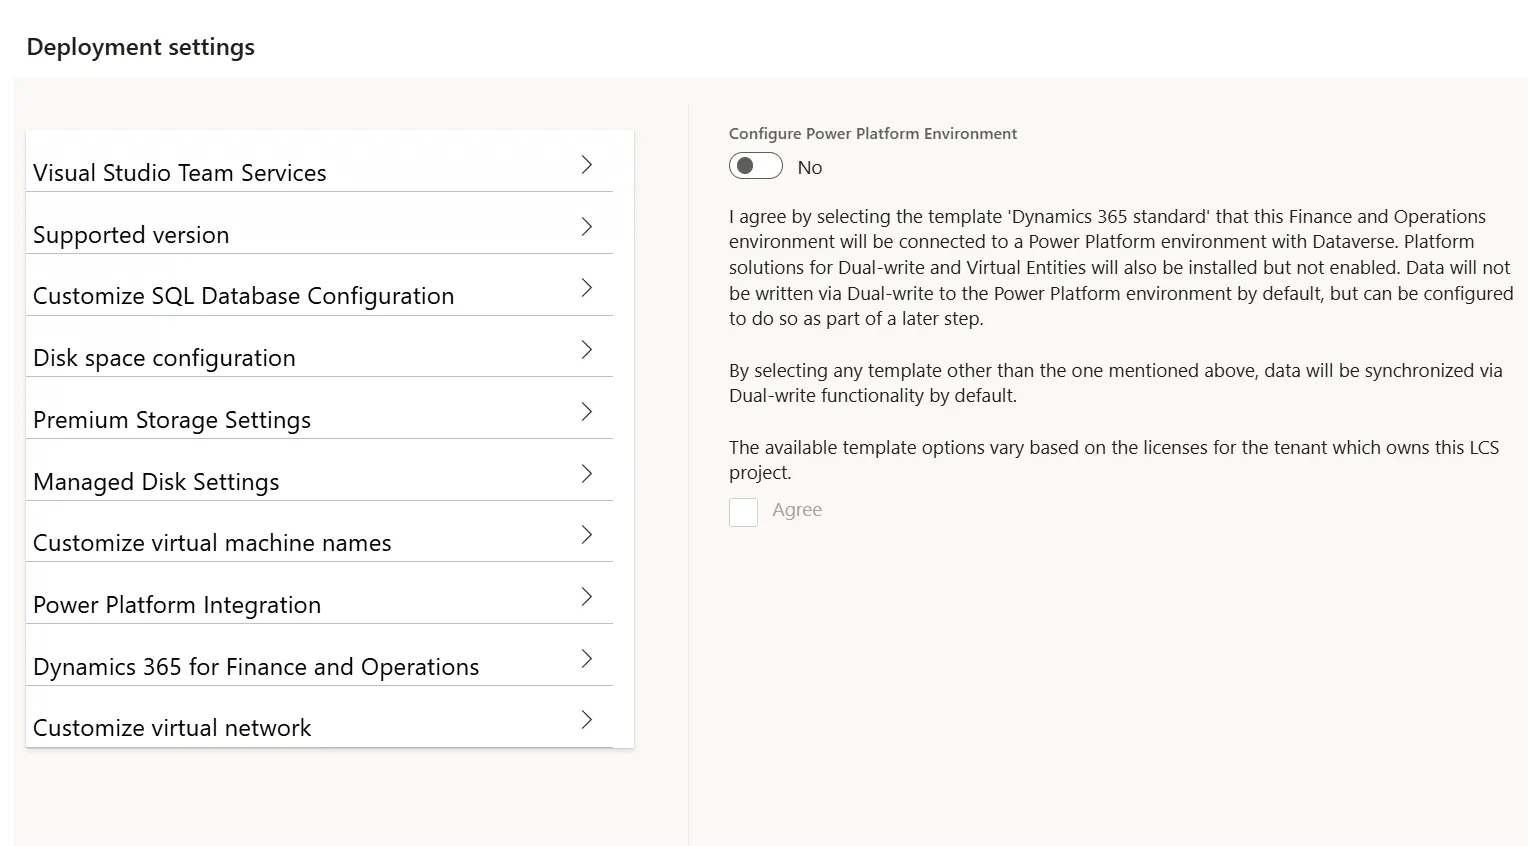
Power Platform Integration. Leave Configure Power Platform Environment on No. A build VM does not need Dataverse.
-
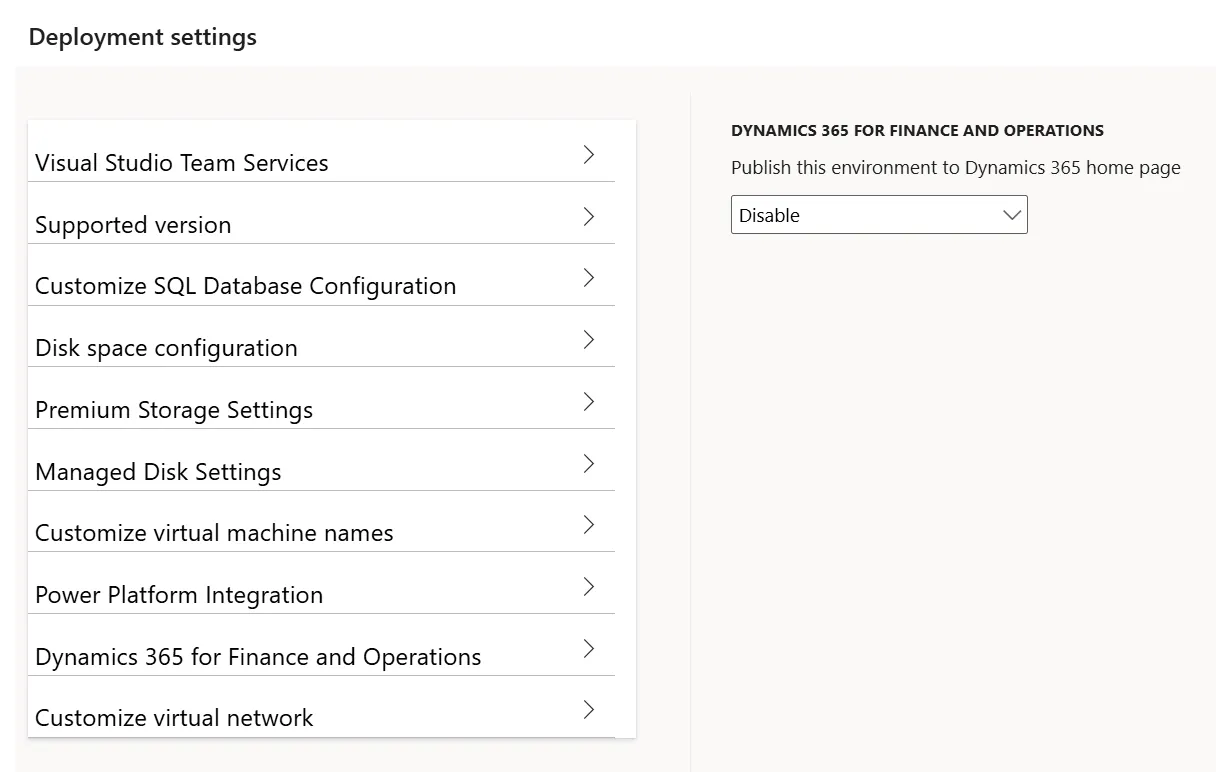
Dynamics 365 for Finance and Operations. Leave it on Disable.
-
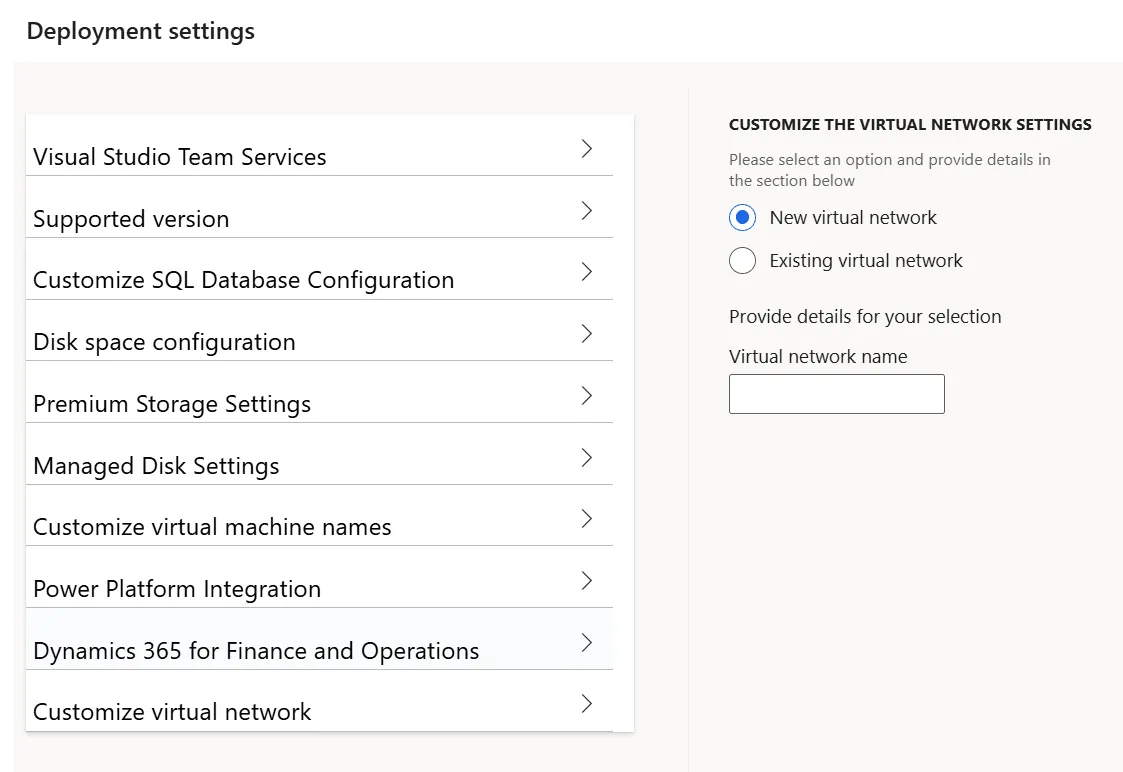
Customize virtual network. Keep New virtual network unless your company requires an existing one.
Select Done to go back to the Deploy environment page.
Step 6. Accept the terms and deploy
If the Azure DevOps project already has a build definition, make sure that no build is scheduled or queued for the pool from step 4.
-
Select the checkbox to agree to the pricing and licensing terms and then Next.
-
In the dialog that opens select Deploy.
-
The status on the Cloud-hosted environments page goes from Queued through Deploying to Deployed. The deployment runs by itself and can take 4 to 8 hours.
If the deployment fails, read the error message in LCS and check the connection from step 1, the TFVC repository and the agent pool from step 4.
Step 7. Check the agent and run the first build
Check the build agent and the default build definition in Azure DevOps:
- In your project select Project settings and then Agent pools. Open the pool from step 4 and select Agents. The new agent should be listed there.
- Select Pipelines in your project, open the default build definition and run it by hand. By default it is scheduled for every day at 5 P.M. If the project already had a build definition from an earlier build VM, update the MSBuild and Visual Studio versions in its tasks by hand.
- Open the finished run. The deployable package is among the artifacts on its summary page.
To apply the package to sandbox and production environments, upload it to the Asset library of the LCS project by hand or with the release pipeline task Dynamics Lifecycle Services Asset Upload, which comes with the Azure DevOps extension Dynamics 365 finance and operations Tools.
Access
The Login menu that opens F&O and the Local accounts for Remote Desktop are on the details page of the environment, as the Access section of part 1 shows.
The build VM holds the source code of your project. By default the whole internet can reach its Remote Desktop port and its HTTPS port, so restrict access to the VM.
Final thoughts
Stop the environment between builds and start it again before the scheduled build, because Azure bills the VM until it is deallocated. Part 1 covers stopping and deleting.
This series also shows how I set up a personal dev environment on Azure.
Do you still build on a build VM or have you moved to Microsoft-hosted agents? Let me know on LinkedIn or through the contact page.
Links
- https://learn.microsoft.com/en-us/dynamics365/fin-ops-core/dev-itpro/perf-test/continuous-build-test-automation
- https://learn.microsoft.com/en-us/dynamics365/fin-ops-core/dev-itpro/dev-tools/hosted-build-automation
- https://learn.microsoft.com/en-us/dynamics365/fin-ops-core/dev-itpro/lifecycle-services/lcs-project-creation-freeze
- https://learn.microsoft.com/en-us/power-platform/admin/unified-experience/finance-operations-apps-overview
- https://learn.microsoft.com/en-us/dynamics365/fin-ops-core/dev-itpro/lifecycle-services/synchronize-bpm-vsts
- https://learn.microsoft.com/en-us/azure/devops/organizations/accounts/use-personal-access-tokens-to-authenticate
- https://learn.microsoft.com/en-us/dynamics365/fin-ops-core/dev-itpro/dev-tools/git-intro
- https://learn.microsoft.com/en-us/azure/devops/release-notes/2024/repos/sprint-240-update
- https://learn.microsoft.com/en-us/dynamics365/fin-ops-core/dev-itpro/perf-test/testing-validation
- https://learn.microsoft.com/en-us/azure/devops/pipelines/agents/pools-queues
- https://learn.microsoft.com/en-us/azure/devops/pipelines/create-first-pipeline
- https://learn.microsoft.com/en-us/dynamics365/fin-ops-core/dev-itpro/dev-tools/pipeline-msbuild-update
- https://learn.microsoft.com/en-us/dynamics365/fin-ops-core/dev-itpro/dev-tools/pipeline-asset-upload
- https://learn.microsoft.com/en-us/dynamics365/fin-ops-core/dev-itpro/deployment/create-apply-deployable-package
- https://learn.microsoft.com/en-us/dynamics365/fin-ops-core/dev-itpro/deployment/cloud-deployment-overview