The complete guide to creating D365 F&O cloud-hosted dev environment
How to deploy a cloud-hosted D365 F&O dev environment in an existing LCS project. The wizard, every advanced setting, the deployment and the first sign-in.

Every developer on a Dynamics 365 Finance and Operations (F&O) project needs a development environment. It is the workspace for all your coding, testing and bug fixing.
This guide shows how to deploy a cloud-hosted environment for development through Lifecycle Services (LCS), from the prerequisites to the first sign-in.
Check first whether this route is still open to you. In October 2026 there are three cases:
- Existing LCS projects. This guide is for them. They can still be used and Microsoft has announced no end date for cloud-hosted environments. The migration from LCS to the Power Platform admin center does not include these environments.
- New customers. This guide is not for them. Microsoft has not allowed new cloud implementation projects in LCS for Finance, Supply Chain Management and Project Operations since 16 February 2026. New customers work in the Power Platform admin center and develop in a unified developer environment, which replaces the cloud-hosted environment.
- Tenants without an F&O license or a partner account. LCS does not let them set up an Azure connector. Use the downloadable VHD instead, which I describe in my post on a personal dev environment.
What each type of environment is for
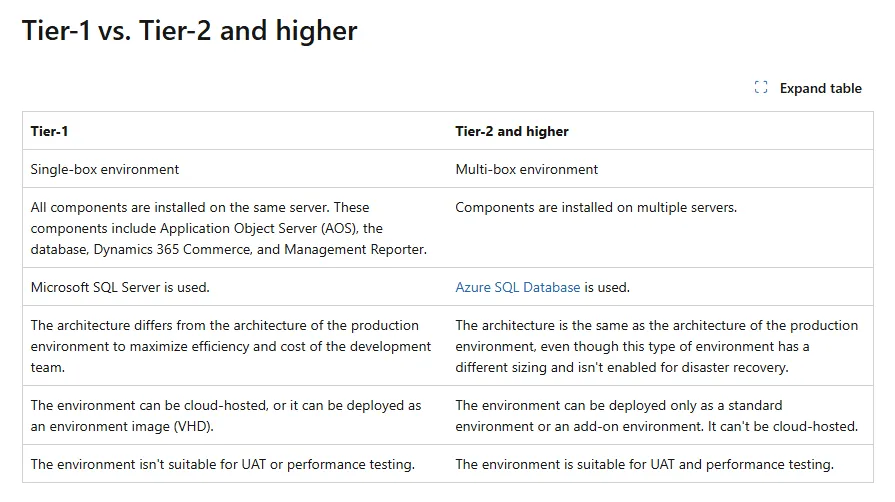
The environment in this guide is a Tier-1 environment, also called one-box. All components, such as the Application Object Server (AOS), the SQL Server database and Visual Studio, are installed on one virtual machine (VM).
Tier-2 and higher environments are multi-box sandboxes for user acceptance testing (UAT) and performance testing. You cannot develop on them.
Cloud-hosted means that the VM runs in the Azure subscription of the customer or the partner, who also pays Azure for it.
The screenshot below shows the comparison on Microsoft Learn.
Before you start
You need these things in place:
- An LCS project. Your user needs the role Environment manager or Project owner in it.
- An Azure subscription. Azure bills the VM until it is deallocated. It bills the disks and networking resources such as the public IP address for as long as they exist. The Azure pricing calculator shows the prices for your region.
- An Azure connector. It links the LCS project to the subscription and sets the Azure region for the VMs. A tenant administrator has to authorize the LCS deployment service once. The owner of the subscription then gives the application Dynamics Deployment Services [wsfed-enabled] and your LCS user the Contributor role on the subscription. The steps are under Azure Resource Manager onboarding.
- Enough vCPU quota. Azure limits the vCPUs per region and per VM family. Check Usage + quotas on the subscription for the region of the connector.
- The right user. The user who deploys the environment becomes its administrator in F&O. The Microsoft Entra tenant of that user becomes the tenant of the environment and cannot be changed after the deployment.
Step 1. Open the deployment wizard
-
Sign in to Lifecycle Services and open your project.
-
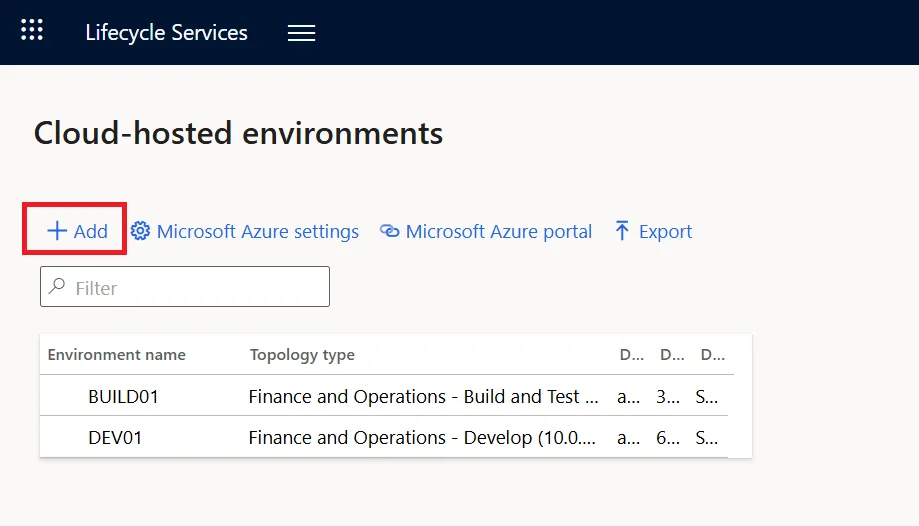
Open the menu at the top of the page and select Cloud-hosted environments.
-
Select + Add.
Step 2. Select the version and the topology
-
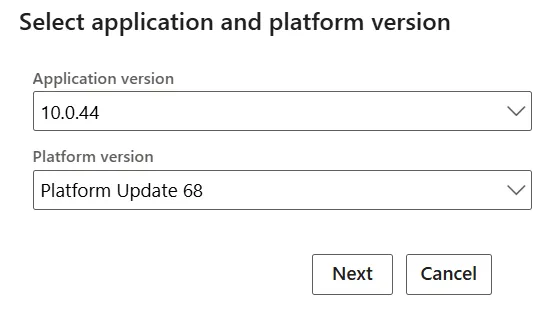
Select the Application version and the Platform version and then Next. Take the version that your production environment runs or, for a new project, the latest one. The screenshots show 10.0.44 with Platform update 68, a version from 2025.
-
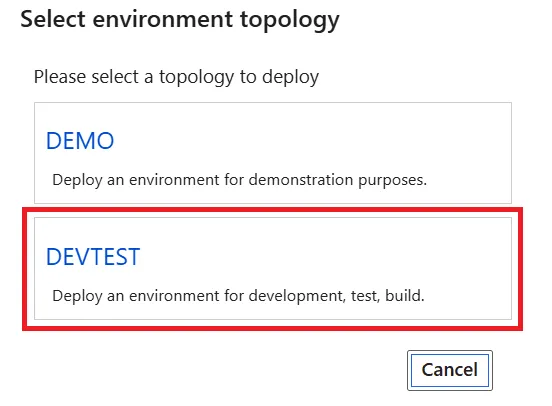
Select DEVTEST as the topology.
-
Select the topology with Develop in its name.
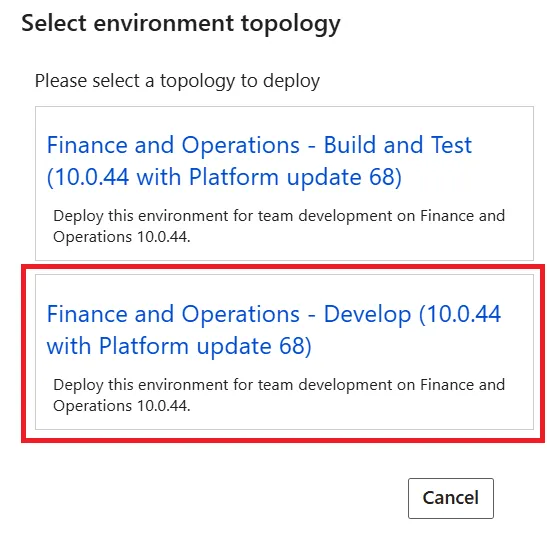
Step 3. Name the environment and choose the VM size
The Deploy environment page opens.
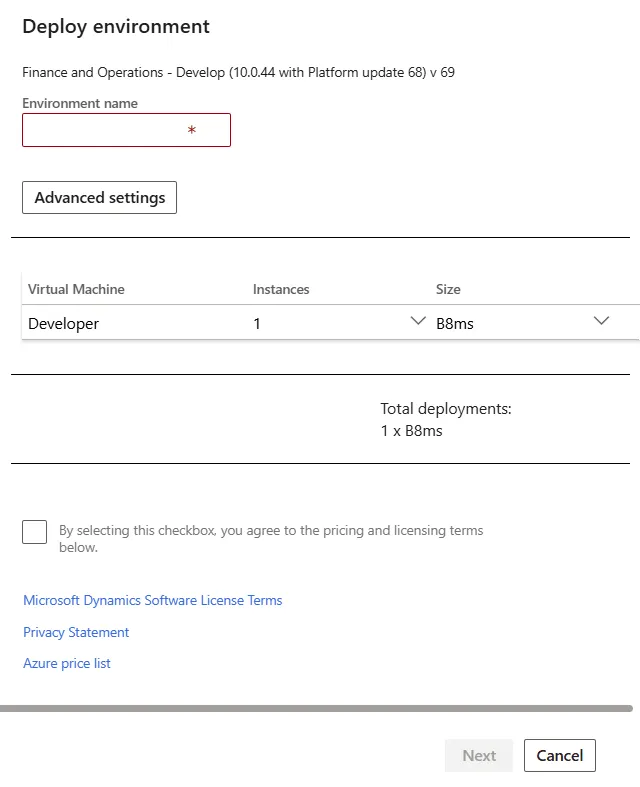
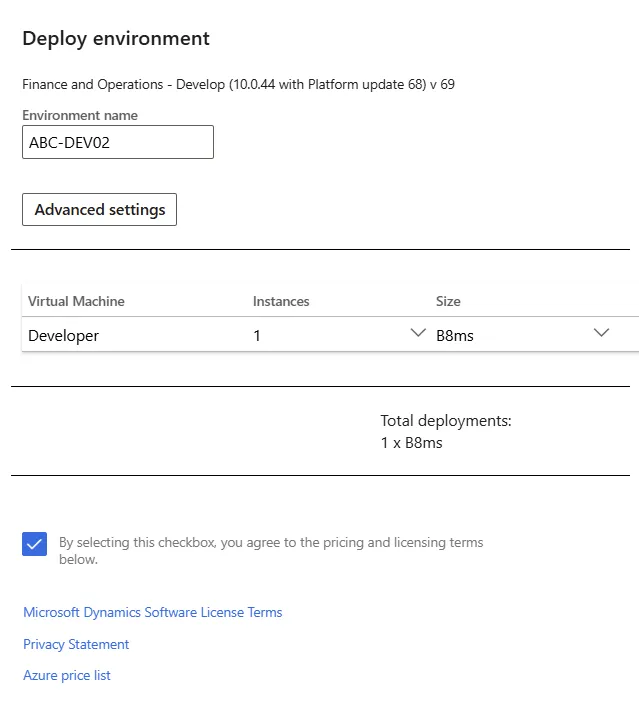
- Enter an Environment name. Use one naming convention for all your environments. For the second development environment of the customer ABC the name could be
ABC-DEV02. - Select the VM size in the Size column. Microsoft’s guideline is 16 GB of memory with two cores, or 24 GB with four cores when several processes run at once. For the demo topology of the same wizard Microsoft tells readers to use Ev5 sizes. The screenshots show B8ms, the size I use in this guide, with 8 vCPUs and 32 GB of memory. Know two things before you take the same size:
- Azure retires the first generation of the B series, which includes B8ms, on 15 November 2028. Since July 2026 a new subscription can no longer deploy that generation and an existing subscription gets no additional quota for it. Azure lists the D, Dv2, Dv3 and Ev3 series under the same restriction, so check the series of any other size before you select it.
- B8ms is a burstable size. When its CPU credits are used up, Azure throttles the VM to 17 percent of its CPU performance.
Step 4. Go through the advanced settings
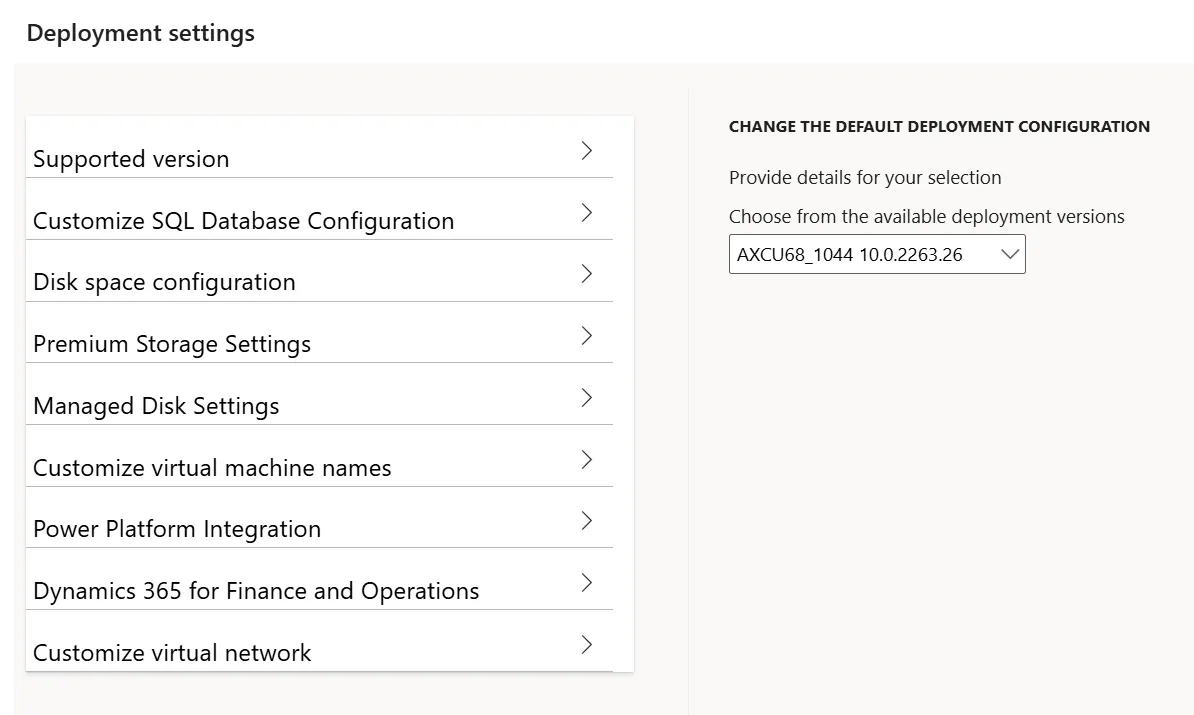
Select Advanced settings. The Deployment settings page opens with nine sections:
-
Supported version. Keep what LCS proposes. It is the deployment version for the version you selected in step 2.
-
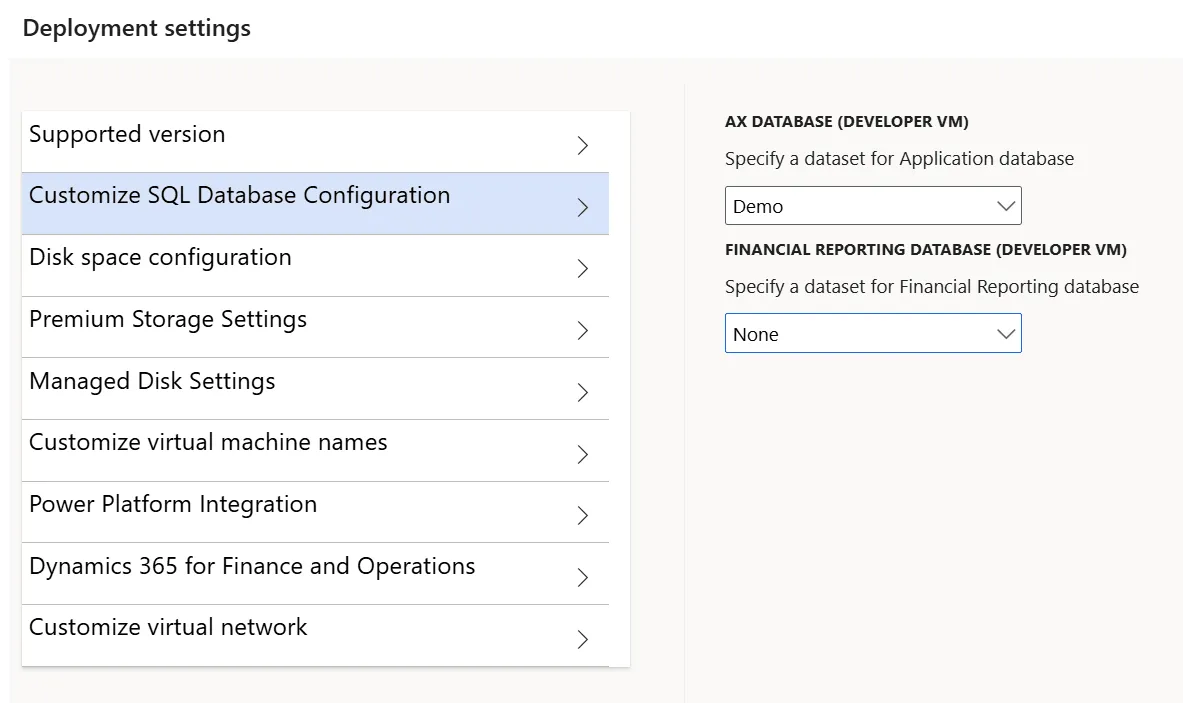
Customize SQL Database Configuration. Two lists set the starting data.
- AX DATABASE is the application database. Demo loads the Contoso demo data with sample customers, products and transactions. None gives you an empty database for your own data.
- FINANCIAL REPORTING DATABASE is the separate database behind the financial reports. A development environment rarely needs data in it, so leave it on None.
-
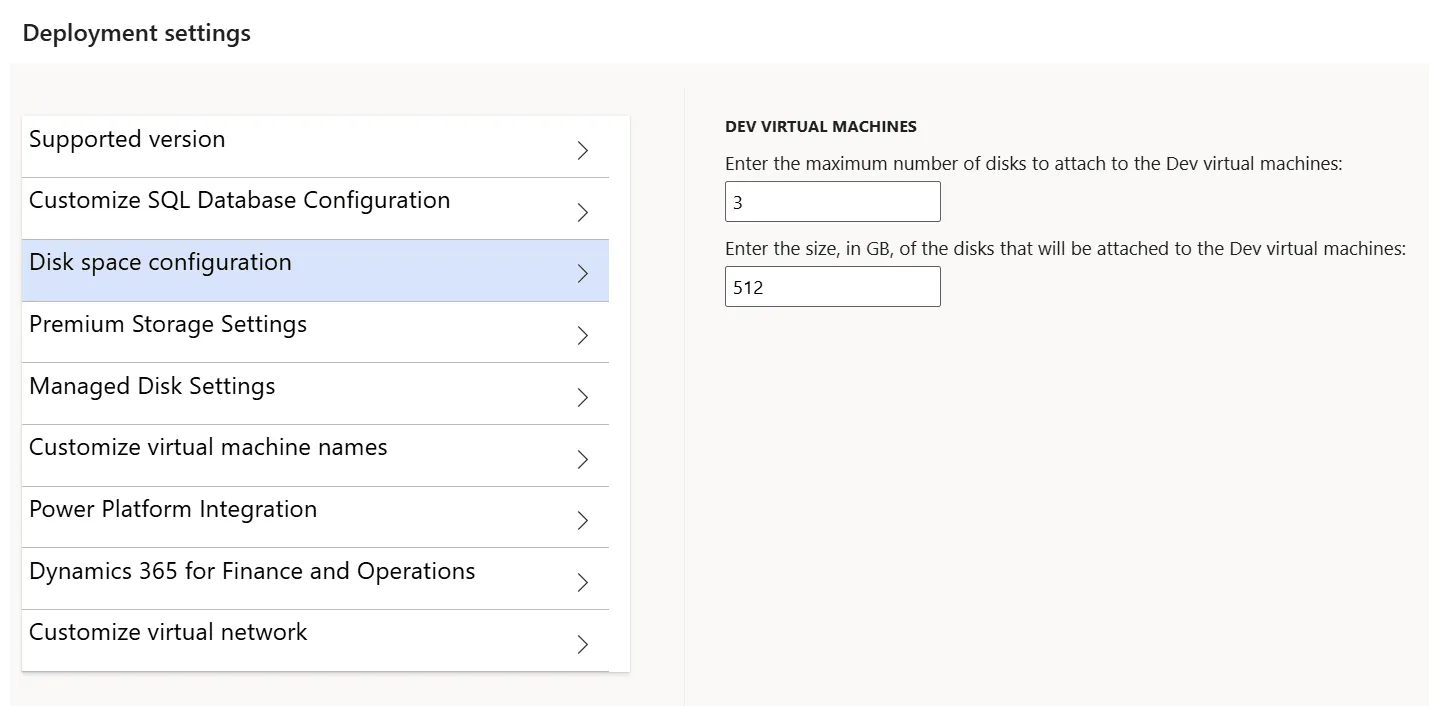
Disk space configuration. Azure bills a managed disk for its full size, so enter no more disks and no more GB than you need.
-
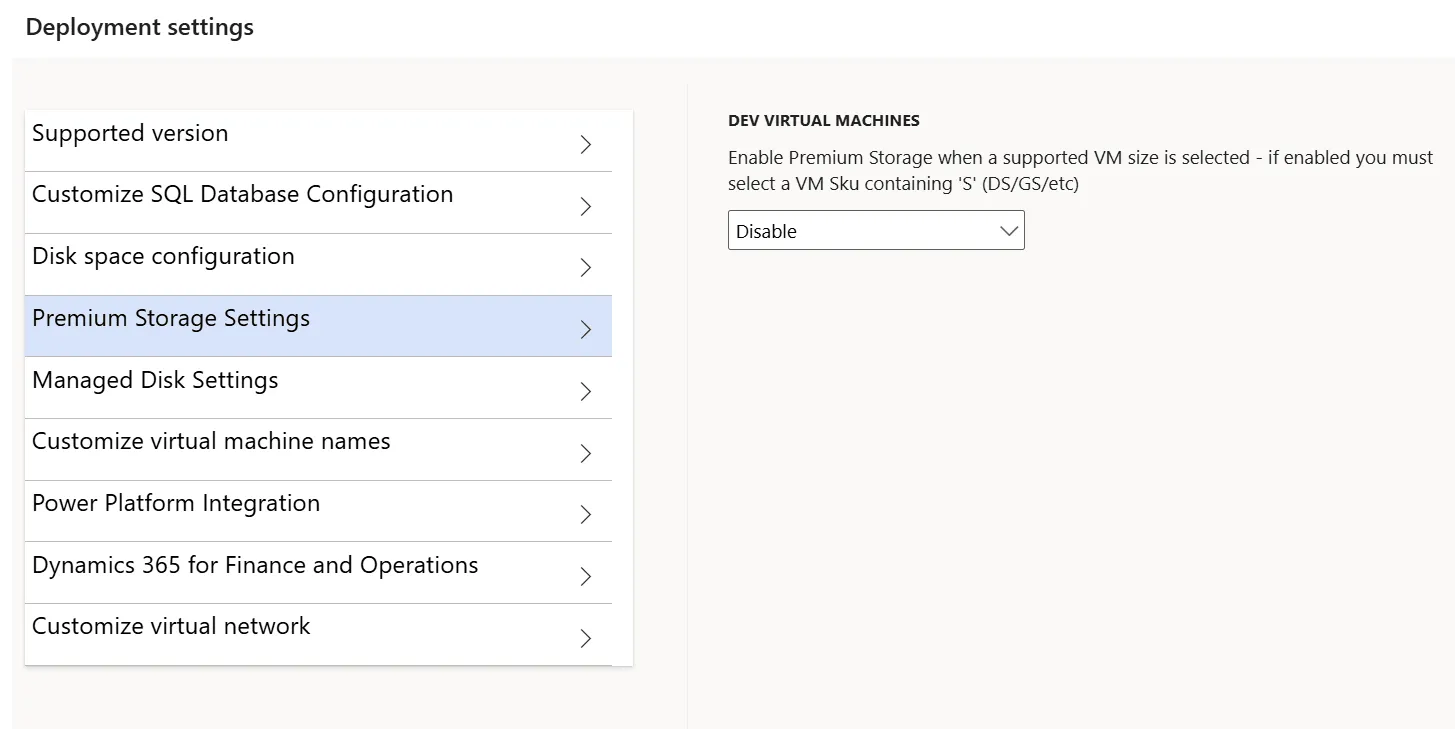
Premium Storage Settings. Select Enable to put the disks on premium storage, which makes compiling code, starting the VM and running processes faster. It needs a VM size with an S in its name. Disable means standard storage, which costs less and is slower.
-
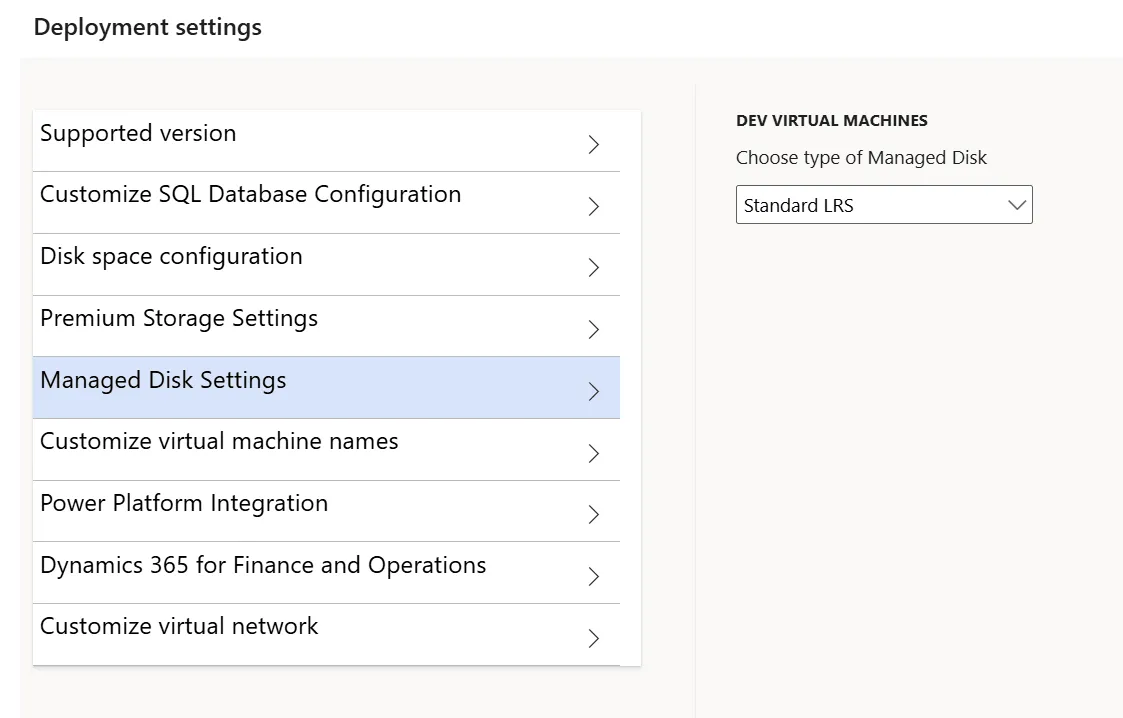
Managed Disk Settings. The screenshot below shows Standard LRS, the cheaper and slower disk type.
- None means unmanaged disks. Do not select it, because Azure retired them on 31 March 2026.
- Standard LRS is Standard HDD, which is not suitable for OS disks or transactional databases. Azure retires it for OS disks on 8 September 2028.
- Premium LRS is Premium SSD.
-
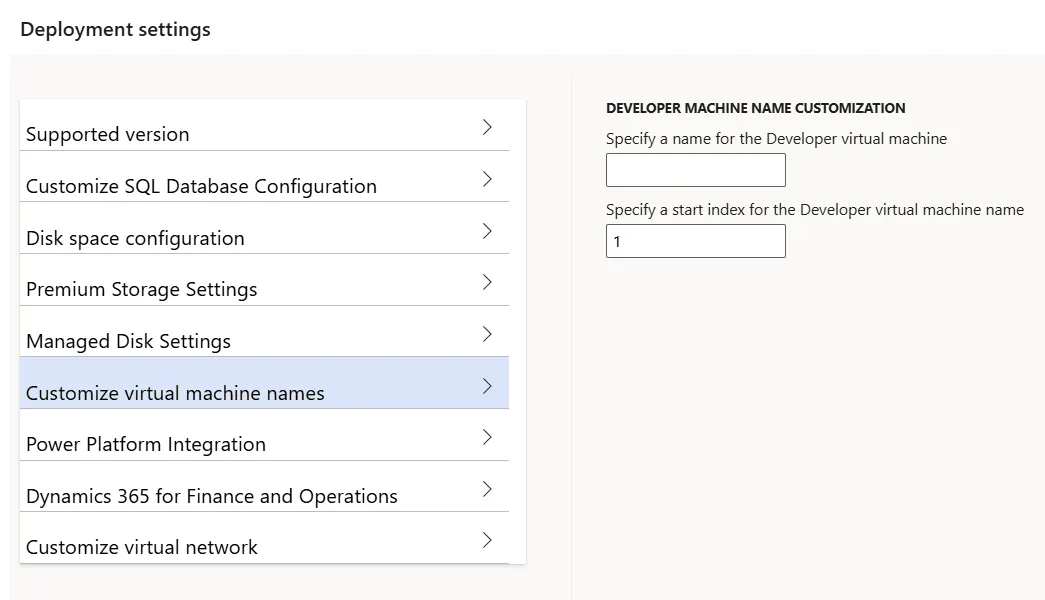
Customize virtual machine names. The two fields are the name of the VM in Azure and a number that is added to the end of it. Enter the environment name from step 3 and keep it short enough that the name with the number added stays within 15 characters, the limit for a Windows host name.
-
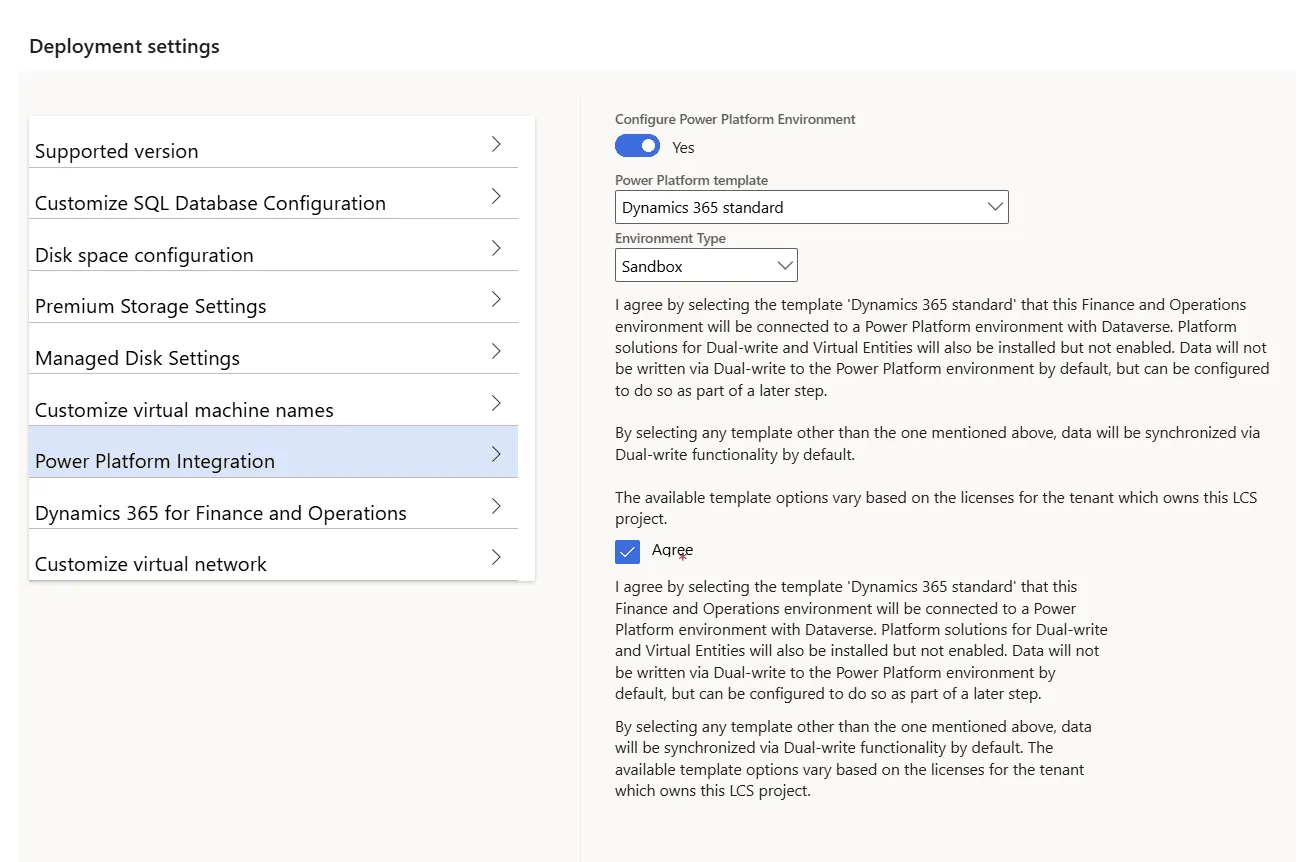
Power Platform Integration. Set Configure Power Platform Environment to No. Power Platform integration for cloud-hosted development environments is deprecated and no longer supported, even where the wizard still shows it. If you need Dataverse together with F&O, for example for virtual entities, use a sandbox or a unified developer environment. The screenshot below still has the switch on Yes. Do not copy that.
-
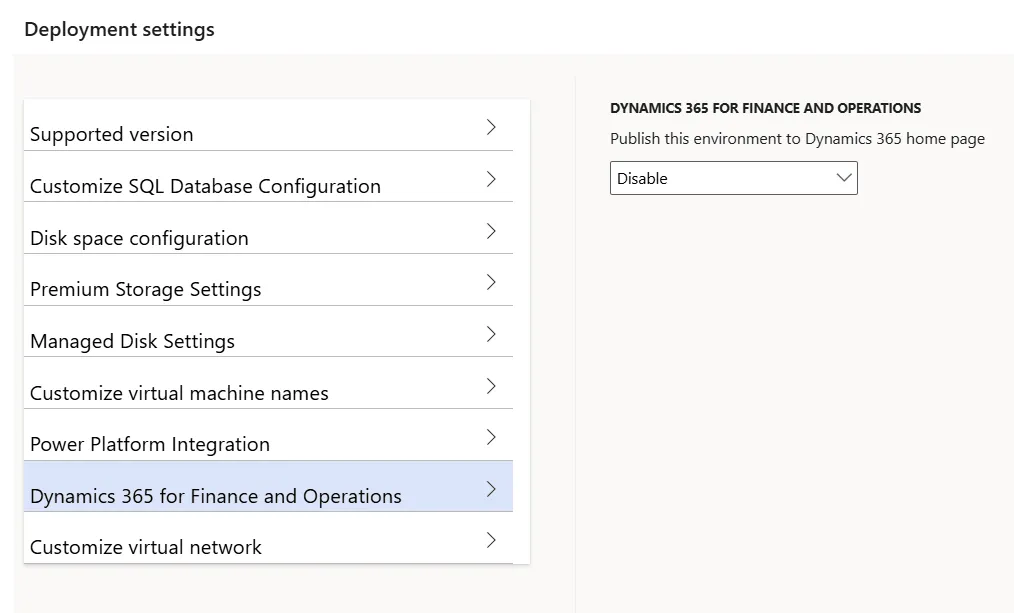
Dynamics 365 for Finance and Operations. The list was meant to publish the environment on the Dynamics 365 home page, which Microsoft has since moved to office.com. Leave it on Disable.
-
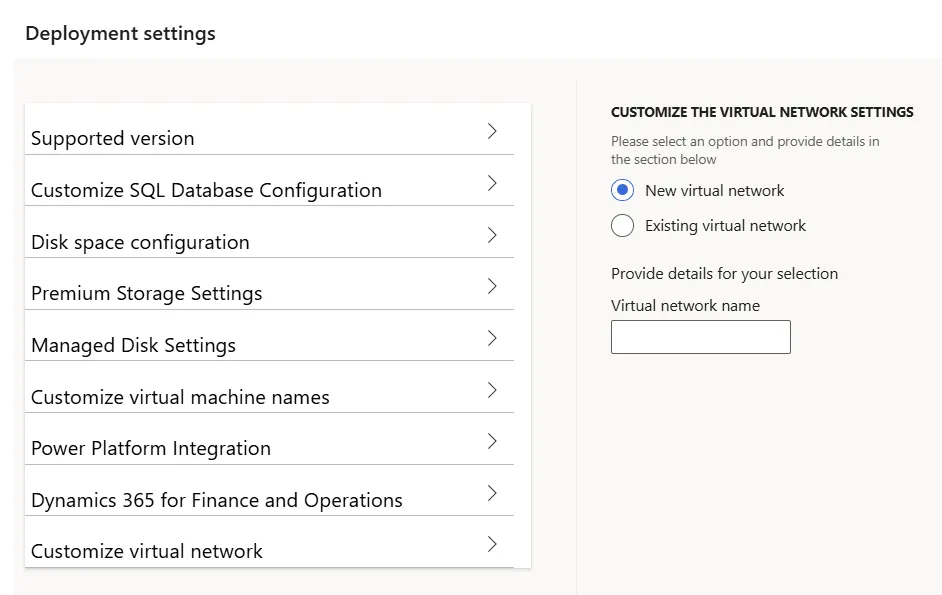
Customize virtual network. Keep New virtual network, the simplest choice. Select Existing virtual network only if your company requires it. It is an advanced configuration that Microsoft support does not troubleshoot.
Select Done to go back to the Deploy environment page.
Step 5. Accept the terms and deploy
-
Select the checkbox to agree to the pricing and licensing terms and then Next.
-
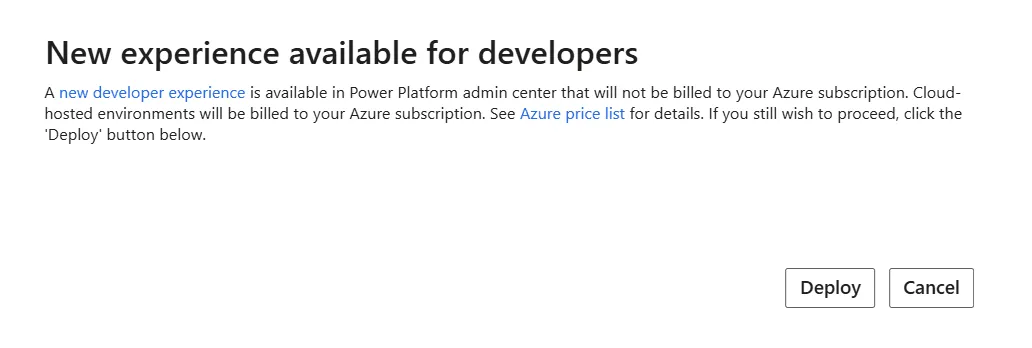
In the dialog New experience available for developers select Deploy.
-
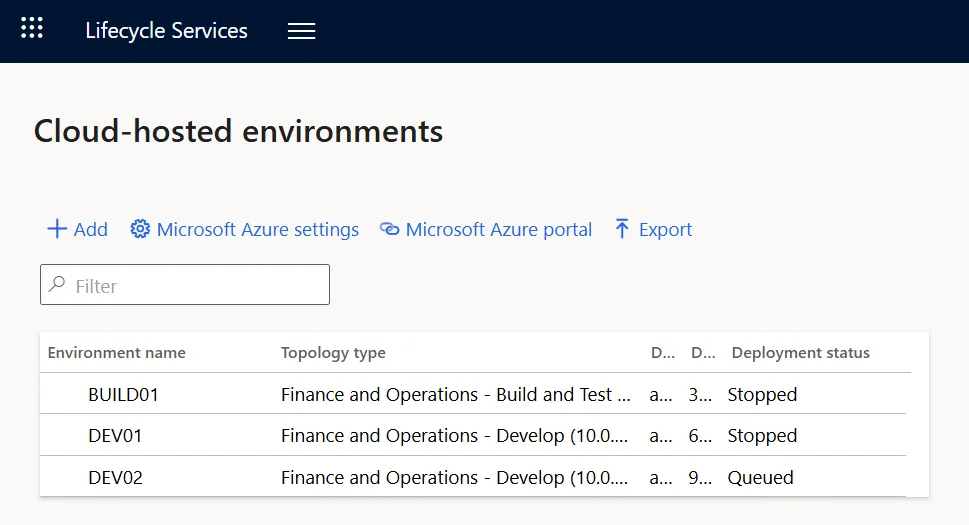
The environment appears on the Cloud-hosted environments page with the status Queued and later Deploying. In the screenshots below the environment is called DEV02.
-
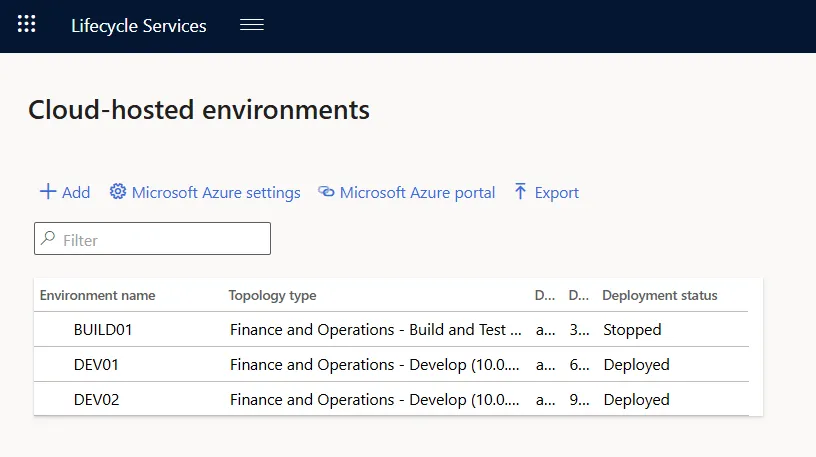
Wait until the status is Deployed. The deployment runs by itself and can take 4 to 8 hours.
Access
- On the Cloud-hosted environments page select the environment name to open its details page.
- To open F&O, select Login > Log on to environment in the upper right corner. Sign in with the account that deployed the environment. Bookmark the address that opens, because it is the URL of the environment.
- To work on the VM, scroll down to Local accounts. The section shows two accounts for Remote Desktop, a developer account and an admin account, with their passwords and a link that opens the connection. Users with the role Project team member do not see the passwords.
- The SQL Server accounts are on the same page. My post on maintenance mode on a development VM uses
axdbadminfrom there.
Restrict access to the VM
By default the network security group of the VM lets the whole internet reach Remote Desktop on port 3389 and HTTPS on port 443. Restrict both.
- In the Azure portal open the resource group that has the name of the environment and then its network security group.
- Select Inbound security rules and open the rule for port 3389.
- Set Source to IP Addresses, enter the addresses that need access in Source IP addresses/CIDR ranges and select Save.
- Repeat steps 2 and 3 for the rule for port 443.
Leave the rule for port 5986 as it is, because LCS manages the VM through that port.
Final thoughts
- Stop the environment when you do not use it. Do it in LCS on the Cloud-hosted environments page and not inside Windows, because Azure keeps billing a VM that is shut down but not deallocated. Afterwards the VM must show Stopped (deallocated) in the Azure portal.
- Delete it when you are done. Select Deallocate and then Delete. Check in the Azure portal afterwards that the resource group with the name of the environment is gone.
The next part of this series covers the cloud-hosted build environment.
Which VM size do you use for your development environments? Let me know on LinkedIn or through the contact page.
Links
- https://learn.microsoft.com/en-us/dynamics365/fin-ops-core/dev-itpro/organization-administration/environment-planning
- https://learn.microsoft.com/en-us/dynamics365/fin-ops-core/dev-itpro/deployment/cloud-deployment-overview
- https://learn.microsoft.com/en-us/dynamics365/fin-ops-core/dev-itpro/dev-tools/access-instances
- https://learn.microsoft.com/en-us/dynamics365/fin-ops-core/dev-itpro/lifecycle-services/lcs-project-creation-freeze
- https://learn.microsoft.com/en-us/dynamics365/fin-ops-core/dev-itpro/lifecycle-services/migrate-lifecycle-services-environments-power-platform-admin-center
- https://learn.microsoft.com/en-us/power-platform/admin/unified-experience/unified-environment-types-and-templates
- https://learn.microsoft.com/en-us/power-platform/developer/unified-experience/finance-operations-dev-overview
- https://learn.microsoft.com/en-us/dynamics365/fin-ops-core/dev-itpro/deployment/arm-onboarding
- https://learn.microsoft.com/en-us/dynamics365/fin-ops-core/dev-itpro/lifecycle-services/configure-lcs-security
- https://learn.microsoft.com/en-us/dynamics365/fin-ops-core/dev-itpro/dev-tools/development-system-requirements
- https://learn.microsoft.com/en-us/dynamics365/fin-ops-core/dev-itpro/deployment/deploy-demo-environment
- https://learn.microsoft.com/en-us/dynamics365/fin-ops-core/dev-itpro/dev-tools/secure-developer-vm
- https://learn.microsoft.com/en-us/dynamics365/fin-ops-core/dev-itpro/power-platform/enable-power-platform-integration
- https://learn.microsoft.com/en-us/power-platform/admin/quickly-navigate-office-365-app-launcher
- https://learn.microsoft.com/en-us/azure/virtual-machines/sizes/lifecycle/retirements-and-capacity-restrictions
- https://learn.microsoft.com/en-us/azure/virtual-machines/sizes/general-purpose/bv1-series
- https://learn.microsoft.com/en-us/azure/virtual-machines/sizes/b-series-cpu-credit-model
- https://learn.microsoft.com/en-us/azure/virtual-machines/disks-types
- https://learn.microsoft.com/en-us/azure/virtual-machines/unmanaged-disks-deprecation
- https://learn.microsoft.com/en-us/azure/virtual-machines/disks-hdd-os-retirement
- https://learn.microsoft.com/en-us/azure/azure-resource-manager/management/resource-name-rules
- https://learn.microsoft.com/en-us/azure/virtual-machines/states-billing
- https://learn.microsoft.com/en-us/azure/virtual-network/manage-network-security-group